
Try this Crispy Jalebi Recipe with step-by-step photos and video. Learn how to make delicious, traditional Jalebi, mithai-shop style with easy instructions. You won’t believe these sweet spirals are homemade!
No baking powder, baking soda, yoghurt or yeast. This Perfect Vegan Jalebi calls upon the process of fermentation to do all the hard work. All you need to do is give the batter time to rest and ferment in line with the tips in my simple video!
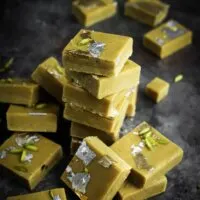
I’ve always believed that the marks of a good Jalebi are a crispy texture and subtle tang. They simply must have that iconic juicy burst of sweetness inside. Tiger orange is my colour of choice but you can make them yellow or any colour for that matter.
What are Jalebi?
Jalebi are famous throughout South Asia and in parts of the Middle East, from where this crispy, sticky sweet originates.
Other names for Jalebi
Jalebi (pronounced: ja-leh-be), is also known as Jilapi, zalabia, zulbia and mushabak, depending on local language.
How to make this Crispy Jalebi Recipe
Jalebi: The batter
Batter for Jalebi must be viscous, yet pourable. It should fall in a rapid and steady stream when you pour it from a height.
The consistency of the Jalebi batter is key to making Jalebi successfully. In my recipe, we obtain this flowing texture through adequate fermentation and the addition of cornflour (cornstarch).

There are many ways in which you can prepare Jalebi batter: Some like to use leavening agents like baking powder, baking soda or yeast for instant or semi-instant Jalebi. Others add yoghurt to speed up the fermentation process. Yoghurt is not a necessary, however.
During the fermentation process, microbes break down sugars and starches from the wheat flour (carbohydrates) into alcohols and acids. This is what creates bubbles in Jalebi batter for a hollow centre, crispy texture and inimitable tang.

Tip! Make Crispy Jalebi Recipe with lemon juice
My preference is to use a combination of lemon juice and the natural process of fermentation, similar to that of making sourdough bread. All the batter needs is time.
This is the way my mithaiwalla grandfather taught my mother and the way my mother taught me. My recipe is vegan.
This Jalebi recipe calls for a 48 hour starter and 24 hour batter. Total inactive preparation time is 72 hours. Don’t be overhwhelmed, this is inactive prep time. All you need to do is mix some ingredients up and leave them out for a few days. Easy!
How to pipe Jalebi: Shape and oil
Jalebi is made by deep-frying batter in a concentric circle or spiral shape until crispy.
You can fry them in oil or ghee, although I prefer oil for a shiny finish. Ghee solidifies at room temperature, which therefore, produces a matte Jalebi.

Oil temperature should be 175°C/350°F. It’s pretty hot so you need to work quickly. Pipe the batter either from the outside in, or inside out – whatever works best for you. You can seal the Jalebi by piping a line through it at the end.
Fry for 1-2 minutes on both sides. If this is your first time, just do one at a time until you get a feel for it. Making Jalebi isn’t easy and requires practice so don’t beat yourself up if your shapes aren’t perfect. Practice and take time. It’s a skill that takes years to nail.
After frying, the web-shaped Jalebi then require a short dunk in sugar syrup until it penetrates the surface and becomes trapped in the hollow structure inside.

What flavours to add to Jalebi
Traditionally, Jalebi has a welcome sourness or tang, which counteracts the sweetness of the sugar syrup. This comes from the fermented batter, similar to what we experience when we eat sourdough bread, idli, uttapam and dosa.
You can choose to leave the flavours to just this subtle tang or add sweet spices to give the Jalebi some more character. My preference is to add ground cardamom, saffron and a small amount of vanilla extract for pure halwai vibes.
Some people also like to add rosewater to their Jalebi. How many additional flavours you add is up to you!

What gives Jalebi its’ orange colour?
The world is your oyster when it comes to colours for your Jalebi. The most iconic colour is orange but yellow is also common. Typically, most Jalebi makers use an artificial food colour.
My colour of choice is a deep tiger orange. I use Wilton Orange Gel Food Colour Paste to achieve this. I recommend a gel-based food colour as it produces the deepest colour without affecting the consistency of the batter.

Powder-based colours or food-grade pigment are also good options.
Note that using a liquid food colour may produce a lighter shade of your chosen colour. Indeed, the same is also true if you opt for natural food colours.
How to make sugar syrup for Jalebi
Cook sugar and water together with a squeeze of lemon juice or lime juice to stop the solution from crystallising. Boil until the syrup reaches 104°C/219°F on a cooking thermometer and then switch it off.

If you overcook the syrup, it will cause the sugar to harden and crystallise on the outside of the Jalebi. If you undercook the syrup, it will make the Jalebi soggy.
Add any spices and extracts after you switch the heat off for the best flavour.
Equipment for making Jalebi
For the most straightforward Jalebi-making experience, be sure to follow my recipe exactly, weighing your ingredients and using a thermometer to avoid mistakes. These tools aren’t too costly and will save on ingredient waste in the long run.
Equipment you need for making this Jalebi:
- Large pan suitable for deep frying. A Kadai is great but I find a Paella pan is even better due to its’ shallow depth.
- Cooking thermometer
- Kitchen weighing scale
- Jalebi cloth (or piping bag fitted with a round nozzle, squeezy bottle or similar for piping the batter into the oil)
- Slotted spoon for frying
Some useful equipment for making this Crispy Jalebi Recipe
This post contains Amazon Affiliate links. These are all products I have purchased of my own accord and ones that I use myself. None of the products mentioned have been gifted to me. By using an affiliate link, I receive a small commission at no expense to you. This commission helps to support this blog. Thanks in advance if you choose to make a purchase through these links!
How to serve Crispy Jalebi
Serve Jalebi warm or at room temperature. In parts of central and Northern India, Jalebi goes hand in hand with Rabri (reduced milk with sugar and nuts).
Where my family come from in Gujarat, we pair it with Fafda (savoury chickpea flour snacks), fried chillies and masala chai.
Some people even enjoy their Jalebi warm with vanilla ice cream. The choice is yours!

Crispy Jalebi Recipe: Toubleshooting
Why is my Jalebi flat?
Your oil temperature is too low. Increase the heat to 175°C/350°F (use a cooking thermometer to gauge this).
Why is my Jalebi brown?
The Jalebi is overcooked or the oil temperature is too high.
Why does my Jalebi have hard sugar crystals on the outside?
The sugar syrup is overcooked. Add some water to loosen it up.
Why is my Jalebi soggy?
The sugar syrup has not been cooked for long enough or the batter has been improperly fermented. Cook the sugar syrup more and add a small amount of flour to the batter.
Making Crispy Jalebi at home: FAQ
Is Jalebi vegan?
My recipe for Jalebi is suitable for vegans.
Is Jalebi gluten free?
No, this Jalebi contains wheat flour so is not suitable for those with gluten or wheat allergies/intolerances.
Can I freeze Jalebi?
Jalebi is not suitable for freezing. It will become soft and soggy.
How to store Jalebi
Keep Jalebi loosely covered at room temperature and consume within 48 hours.
How to make Jalebi crispy again
This recipe for Jalebi will produce a sweet that remains crispy for days. However, if you find your Jalebi has softened, you can bake it in a pan for 2-3 minutes at 200°C/400°F to make it crispy again.
Crispy Jalebi Recipe | How to make Jalebi at home the traditional way


Equipment
- Large pan suitable for deep frying
- Cooking thermometer
- Kitchen weighing scale
- Jalebi cloth (or piping bag fitted with a round nozzle, squeezy bottle or similar for piping the batter into the oil)
- Perforated skimmer/slotted spoon for frying
Ingredients
For the Jalebi starter (attho):
- 125 g plain flour (all-purpose flour/maida)
- 180 ml warm water
- 1 tsp lemon juice
For the Jalebi batter:
- 450 g plain flour (all-purpose flour/maida)
- 290 ml room temperature water
- 1 1/2 tbsp cornflour (cornstarch)
- 1/2 tsp orange gel food colour
For the sugar syrup:
- 1 kg granulated white sugar
- 500 ml water
- 7 green cardamom pods, seeds crushed (discard the husks)
- 10-12 saffron strands
- 1 tsp vanilla extract
- 1 L cooking oil for deep frying
Instructions
For the Jalebi starter (attho):
- In a bowl, whisk together the flour, water and lemon juice. Beat until very smooth. Cover the bowl with cling film (plastic wrap) and leave out on the countertop for 48 hours. If it's particularly cold in your kitchen, leave the mixture somewhere warmer.
- After 48 hours, the mixture should smell sour and have small bubbles visible on the surface. If this isn't the case, you'll need to leave it for another day. The fermentation will happen quickly if the batter is left in a warm place.
- Note: The batter will be thinner and smoother in appearance after it has been fermented.
For the Jalebi batter:
- Place the flour in a large bowl. Add the 48-hour fermented starter. Stir briefly to incorporate, then add 290ml room temperature water. Beat vigorously with a whisk until the mixture is relatively smooth, about 5 minutes. Some lumps are fine and will break down during the second fermentation.
- Cover the bowl with cling film (plastic wrap) and leave out on the countertop for 24 hours. If it's particularly cold in your kitchen, leave the mixture somewhere warmer.
- After 24 hours, the mixture should smell sour and have small bubbles visible on the surface. Note: The batter will be thinner and smoother in appearance after it has been fermented.
- Take approximately 100ml fermented batter in a bowl and add the cornflour. Stir will to combine. There should be no visible lumps in the mixture. Add this slurry to the bowl of Jalebi batter. You might need to use a silicone spatula to remove it all from the bowl as it can be very sticky.
- Beat the mixture until smooth and ribbon-like in consistency, about 7 minutes. The mixture should leave a ribbon-like trail on the surface of the batter when drizzled from a height.
- Add any food colour you might like to use. Whisk it in and allow the batter to rest for 10-15 minutes while you make the sugar syrup.
For the sugar syrup:
- Place the sugar in a large, wide saucepan. Add water and lemon juice and bring to the boil.
- Cook the sugar syrup until it reaches 104°C/219°F on a cooking thermometer and then switch the heat off.
- Add the ground cardamom seeds, saffron and vanilla if using. Stir and set aside.
To make the Jalebi:
- Heat the oil in a large, wide pan suitable for deep frying. I find a paella pan is perfect for this job. The oil temperature should reach 175°C/350°F before you start piping.
- Pour some of the Jalebi batter into a Jalebi cloth, squeezy bottle with a round hole or piping bag fitted with a round nozzle (about 4mm round).
- Keep the nozzle as close as you can to the oil for better control but be careful not to get so close that the oil spits at your hand.
- Begin to pipe spirals of batter into the hot oil, either working from the inside out or outside in. Around 5 turns per spiral is optimal. Finish your spiral with a straight line through the centre to seal the Jalebi.
- Fry the Jalebi for around 40 seconds per side. Turn it only once it firms up to avoid breaking it. Don't let the Jalebi brown in the oil as this will ruin the taste.
- Lift the Jalebi from the oil and carefully shake off any excess oil. Put the Jalebi straight into the warm sugar syrup and press gently to submerge it. Leave the Jalebi in the syrup for 3-4 minutes and then lift out onto a plate.
- Repeat this process for the remaining Jalebi batter. As you build up more confidence, you can pipe more than one Jalebi at a time.
- Stack the Jalebi as you like. I decorated mine with fresh rose petals. Serve warm with Rabri or Fafda and Chai.
Recipe Video
Sanjana’s Notes
- Making Jalebi isn’t easy and requires practice so don’t beat yourself up if your shapes aren’t perfect. Practice and take time. It’s a skill that takes years to nail.
- Jalebi are not suitable for freezing.
- Keep Jalebi loosely covered at room temperature and consume within 48 hours. They are best eaten as fresh as possible.
- Store any leftover syrup in a clean bottle in the fridge. You can use it for more Jalebi or even Gulab Jamun or Rasgulla.
Pin this Perfect Homemade Jalebi recipe for later!
These juicy jalebis are crispy on the ouside and simply burst with flavour when you eat them. They’re best served warm with Rabri, fafda or chai.

If you like this, you’ll love my recipe for White Burfi

More Indian sweet recipes


Love Sanjana