


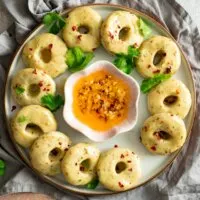
Learn how to make Perfect Chakri. A delicious, swirly Indian savoury snack of rice flour and spices. Chakri is popular across India, and indeed, around the world.
It’s famous in the states of Maharashtra, Karnataka, and Gujarat.
Variations of Chakri are also enjoyed in Mauritius, South Africa and Indonesia.
This is my late aunt, Krishna Fai’s recipe and they’re famous in our family. They’re buttery, crunchy and seasoned with just the right amount of spices.
Spicy, salty, sour and just a little hint of sweetness to balance it all out. This Chakri gets more and more addictive with every bite.
What is Chakri?
Recipes for Chakri exist in many forms. The dough is a preparation of flour or multiple flours, ranging from rice flour, gram flour and urad flour.
Any or all may be used depending on the type of Chakri you’re making.
My recipe calls for only rice flour. It is so easy to prepare the dough.
The extrusion however, might take a little practice.
What equipment do I need to make Perfect Chakri?
For the dough, you’ll need a big, wide bowl to mix all the flour, spices, butter and water together.
To shape the Chakri, you’ll need an Indian-style extruder. These are usually made from either brass or stainless steel and have many uses.
We call this a Sancho in Gujarati and the various plates it comes with is suitable for making a number of different foods like Chakri (Murukku), Sev, Gathiya, Bhujia, Idiyappam and more.


Made out of heavy duty metal, the tall cylindrical container of a Sancho, a long rotating handle and shapes disc plates will allow you to not only create different shaped or thickness Indian snacks.
You can also use this machine to make pasta and noodles.
A wide, flat paella pan is a good choice for deep frying and ensures the chakri remain submerged, yet you need not use too much oil.
Things you might need (affiliate links)
What does Chakri mean?
According to Hindu scriptures, Sudarshana Chakra is the deity, Lord Vishnu’s disc of auspicious vision. It is after this that Chakri is named.
A spinning disc of 108 serrated edges, this celestial weapon is often depicted sitting one of the four hands of Vishnu, the god of Preservation.
The Sudarshana Chakra is also known to represent the wheel of time, and this all of this is what makes Chakri a cherished food during Hindu festivals like Diwali.
When is Chakri made?
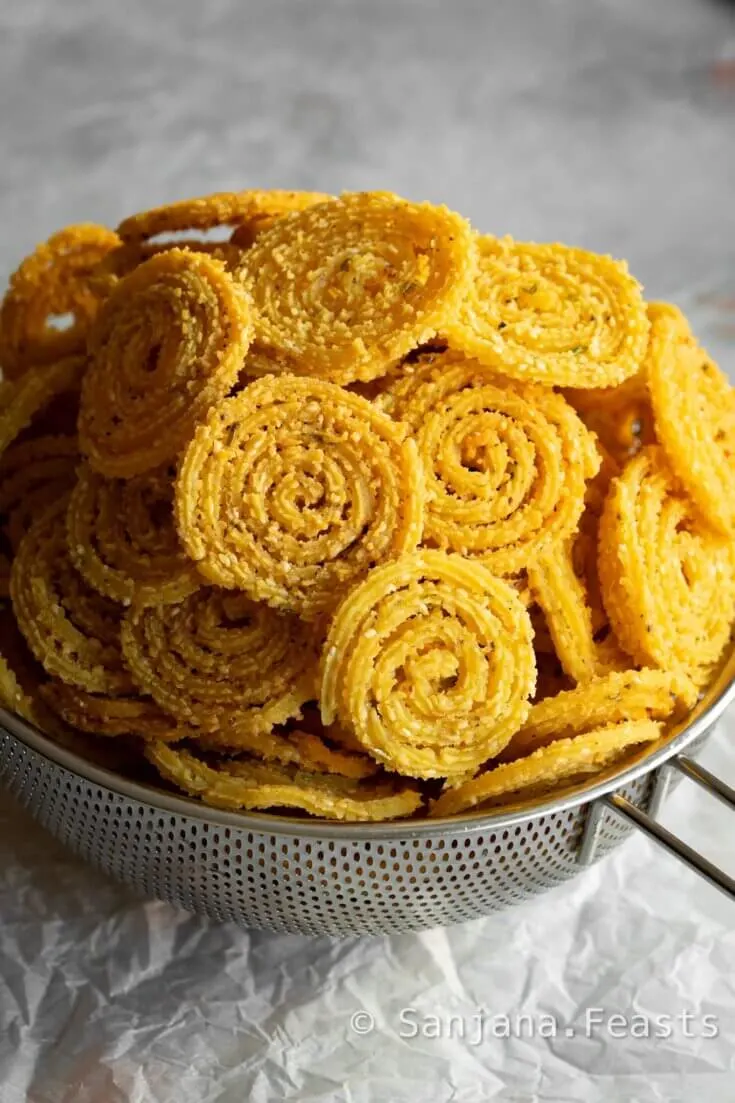
Crispy, crunchy Chakri is a spiral-shaped rice flour snack famous across India and within diaspora communities.
They’re most popular at Diwali time but you can make them whenever the craving for something savoury and snacky hits. Enjoy with drinks.
Wait, is it Chakri or Chakli?
I’m Gujarati and we call this Chakri but Chakli or Chakali is typically what it’s called in Marathi, but let’s not forget this snack has several variations and goes by several names.
I suggest trying them all because each one will be as delicious as the last.
You can never have too many snacks.

How to make Perfect Chakri (easy, no steaming)
Prepare the chakri dough


To make the dough, take rice flour, sesame seeds, ajwain, black pepper, turmeric, salt, sugar, grated ginger, minced green chillies and optional orange food colour in a bowl. Mix well.
Add melted salted butter and rub the mixture together until it resembles coarse breadcrumbs.
Pour in warm water and bind to create a dough. Knead for 5-8 minutes. Cover with cling film and rest the dough for 20 minutes.
Set up the Chakri Sancho/Sancha for extruding and shaping
Set up an Indian-style extruder with a star tip disc. I have one like this Sancho (affiliate link). Fill the extruder with dough and screw the lid back on.
Shape the chakri
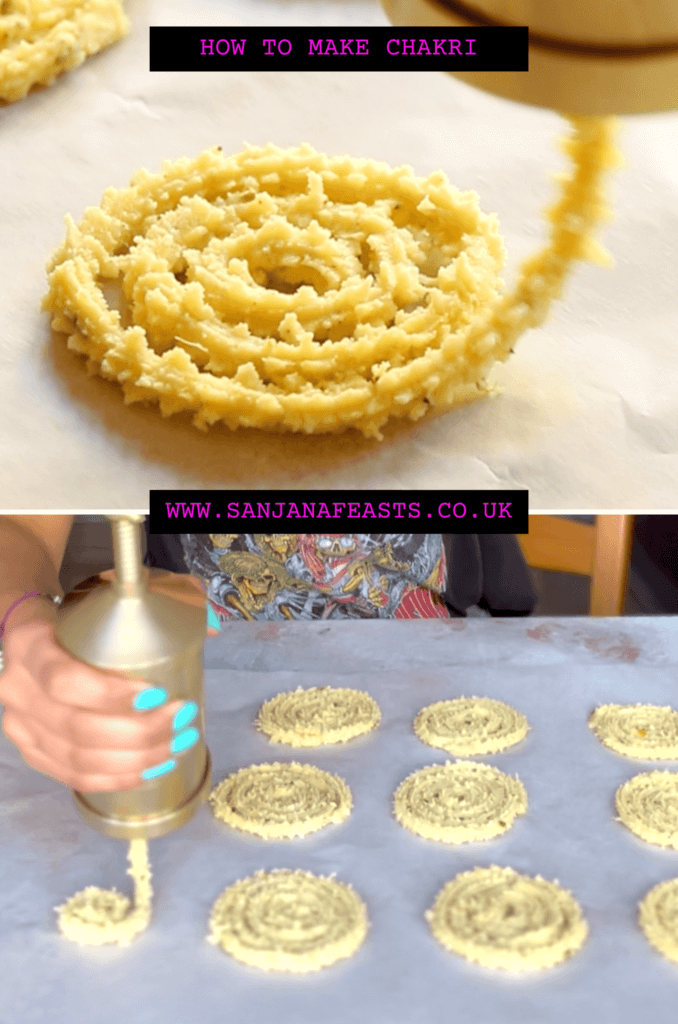
Line your work surface with a long sheet of baking parchment.
Slowly turn the handle to extrude the dough into a long strand and coil it to shape into a spiral. Watch my recipe video to see a visual demonstration for shaping Chakri. I usually do about 5 turns but you can make them any size you like.
If you don’t feel confident in making the coil shapes, you can extrude the dough directly into the hot oil (carefully) to make long sticks that can be broken into smaller sticks later. They’ll still taste great, don’t worry.
Fry the chakri

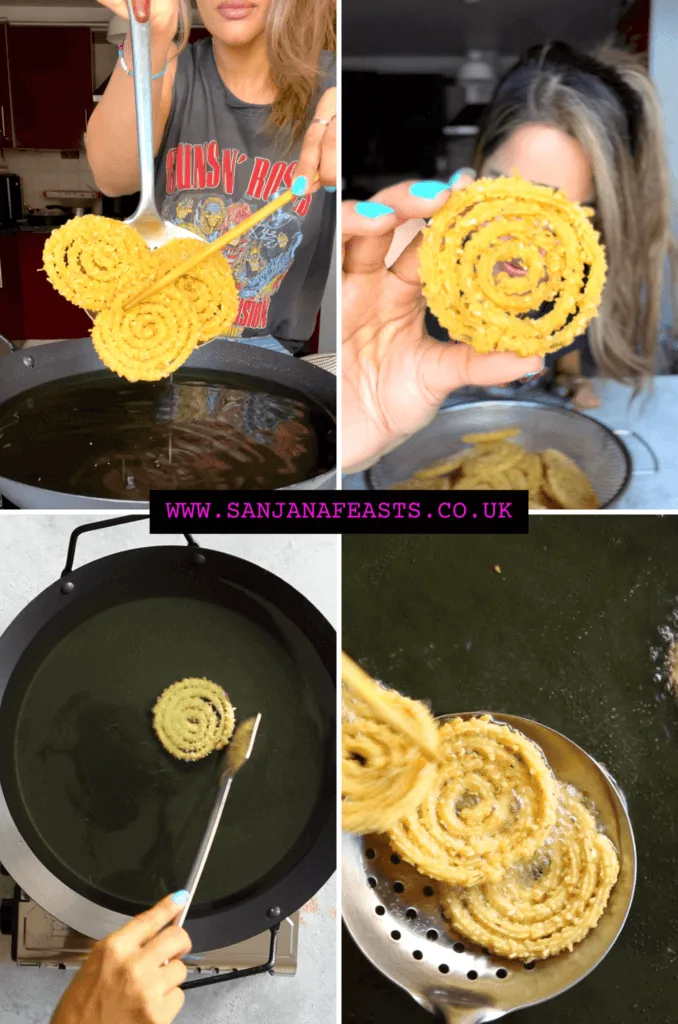
Be sure to deep fry the Chakri in enough oil to cover. Do not overcrowd the pan. Turn with chopsticks or tongs to minimise breakage. Try not to move the Chakri too much until it begins to firm up, about 90 seconds. Total fry time per batch of Chakri will be around 3 minutes.
Drain the chakri and cool
Remove from the oil and allow to drain on absorbent kitchen towel. Once completely cool, store in an airtight container. The texture of the Chakri will develop and be at its best after around 24 hours.
How long does it last?


Chakri will keep well for around 4 weeks. Be sure the storage container is well sealed.
Notes on making Perfect Chakri
- Krishna Fai’s recipe for Chakri has a medium-crisp texture. If you would like your Chakri to be firmer still, reduce the amount of butter and water by 20%.
- If you prefer softer Chakri, feel free to increase the amount of butter only, by 20%.
- Use a star-shaped extrusion plate when making Chakri.
- The size of the extrusion hole will also affect the texture of the chakri. The narrower the star, the crunchier the Chakri.
- Oil temperature is important. Keep the oil between 150°C and 160°C at all times during the Chakri frying process.
- Line a big, clean work surface with baking parchment before you begin shaping the chakri.
- While frying, gently turn the Chakri with chopstick(s) to minimise breakage.


Can I air fry Chakri?
Deep frying chakri produces the best, crispy results. I never bake or air fry them but feel free to give it a go if you like. I imagine they would be much crunchier.
Is this Perfect Chakri gluten free?
Yes. This recipe for Chakri is gluten free. Many recipes contain asafoetida which is often not suitable so be sure to check ingredients and labels if you are avoiding wheat/gluten.
Is Perfect Chakri vegan?
This recipe for Chakri calls for salted butter. However, to make a vegan version, simply swap the butter for your favourite brand of dairy-free butter. Try to use the kind that comes in a block, rather than the soft, spreadable type from a tub.
You might also like
- Khandvi recipe
- Kenyan Chevdo recipe
- Muthiya recipe
- Handvo recipe
- Khaman (Dhokla) recipe
- Air-Fryer Samosa recipe
Perfect Chakri recipe | Chakli, Murukku, Moolkoo recipe
Perfect Chakri

Learn how to make Perfect Chakri. A buttery, swirly Indian savoury snack of rice flour and spices. This is my late aunt, Krishna Fai’s recipe and they’re famous in our family. So crunchy!
Ingredients
- 1kg fine rice flour
- 100g sesame seeds
- 150g salted butter, melted
- 2 tbsp grated ginger
- 2 tbsp finely minced green chillies
- 1 1/2 tbsp salt
- 3 1/2 tbsp sugar
- 1 tsp citric acid
- 1/2 tsp ground turmeric
- 2 tsp ground black pepper
- 1 tsp ajwain
- Very small pinch of orange food colour (optional)
- 750ml warm water
Instructions
- Place fine rice flour in a large bowl. Add sesame seeds, salt, sugar, citric acid, ajwain, black pepper, turmeric, ginger, chillies, and optional orange food colour. Stir well to combine.
- Add the melted butter to the dry ingredients and rub together to create a coarse breadcrumb-like texture.
- Pour in the warm water, bind and knead for 5-8 minutes to create a soft, smooth dough. Cover with cling film and rest the dough at room temperature for 20 minutes.
- Line a large, clean work surface with baking parchment.
- Fix your Chakri maker (extruder) with a disc stamped with a wide star shape. Fill with dough and crank the handle to begin extruding dough. Initially, allow for a few centimetres to fall, using your fingers to begin the coiling process. Continue to extrude dough, gently swirling outwards, in concentric circles. You can go clockwise or anti-clockwise, that doesn't matter. I do 4-5 full turns per chakri but they don't have to be identical.
- Continue to press the dough until all the chakris have been shaped. If you run out of space, you may need to fry some to make more space.
- Fill a pan suitable for deep frying with oil and allow the temperature to come up to 150°C-160°C. Use a flat metal spatula to carefully pick up the chakri and slide them into the oil, one by one. Do not overcrowd the pan, Fry for 90 seconds and then use chopsticks to turn them. Repeat for a further 90 seconds on the other side. Be careful when turning as they are quite delicate at this stage.
- Use a perforated frying spoon to carefully lift the chakri out of the oil. Drain in a colander or on a plate lined with absorbent kitchen towel. Allow the chakri to cool completely before packing into an airtight container. They will firm up and develop flavour overnight.
Notes
- The flavour and texture of the chakri will improve after 24 hours of being stored.
- Chakri keep well in an airtight container for 1 month.
- Be sure to very finely mince/grate or blend the ginger and chillies. If they're too chunky, they will cause splitting in the dough when you try to extrude and shape the Chakri.
- Orange food colour is totally optional. Feel free to skip it if you wish.
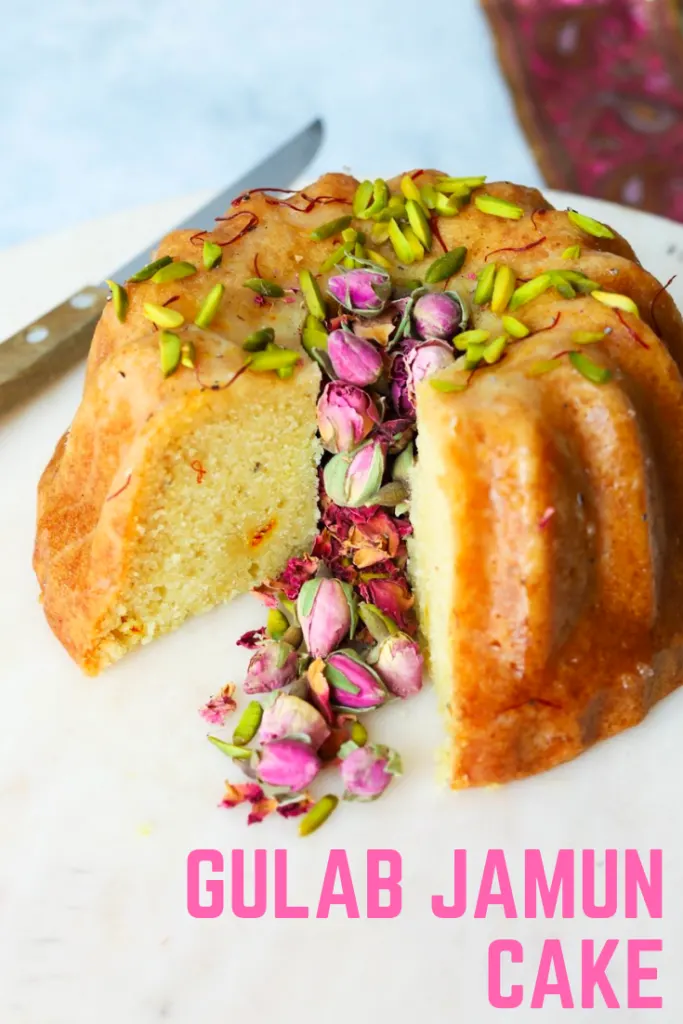
If you like this Perfect Chakri, you’ll love my recipe for Eggless Gulab Jamun Cake

Gujarati recipe collection


Lo